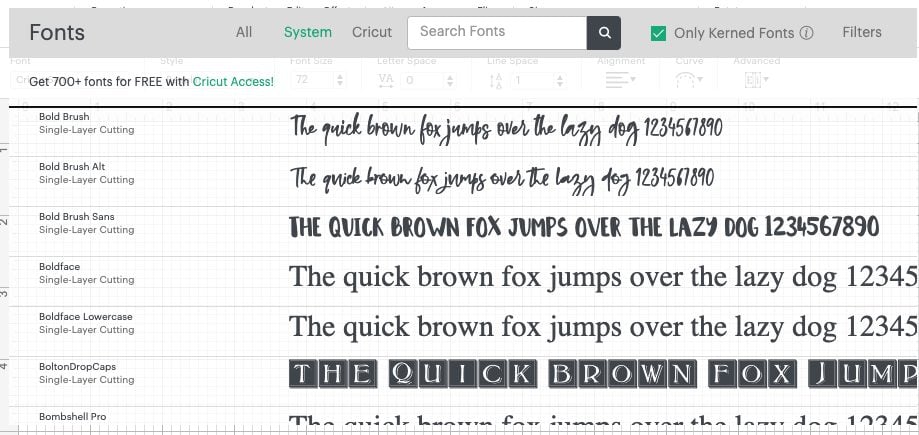
Cricut users know the importance of using beautiful fonts. Even though Cricut Design Space offers captivating fonts, users still want to try something else. Due to this, they tend to find fonts from the internet. Many websites, such as Google Fonts, Dafont, and more, provide various fonts. Plus, we will learn how to upload font to Cricut.
In other words, the guide will explore how to download Cricut fonts on Windows and Mac. Then, we will upload fonts to Cricut Design Space. By the end of the post, you will learn where to find fonts, how to download fonts on different platforms, and finally, how to upload fonts.
Where to Download Fonts?
On the internet, you can find several free and paid websites to download your fonts—for example, fonts.google.com and dafont.com. However, we recommend you go with Creative Market and Creative Fabrica, which offer high-quality and beautiful fonts.
Most fonts come with free downloads and a personal use license, meaning you can use them only in your personal projects. But for commercial use, you have to use a commercial license.
Furthermore, we will learn how to upload font to Cricut. Before this step, you need to install the fonts on your devices. Afterward, we will learn to upload fonts to your Cricut. Let’s start the installation of the font on a Windows computer.
How to Download Fonts on Windows Computers?
You must download the font on your PC before you upload the font to your Cricut. This process will take a couple of minutes from downloading to installation.
Follow the steps to download the font on Windows:
- First, choose which website you want to download the font from.
- Then, download the file and then open it.
- The file will download ina .zip file.
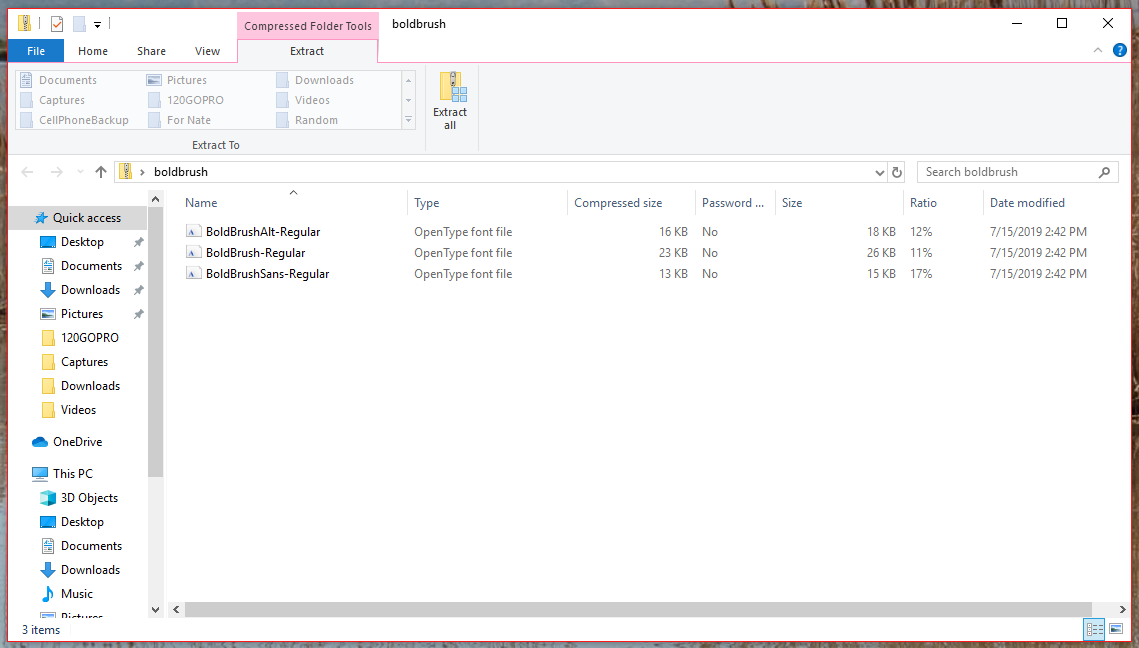
- Right-click on the file and select if you have downloaded multiple font files.
- Then, right-click and select the Extract option to unzip them.
- You will be asked to choose the destination folder to extract. Here, we chose the desktop option.
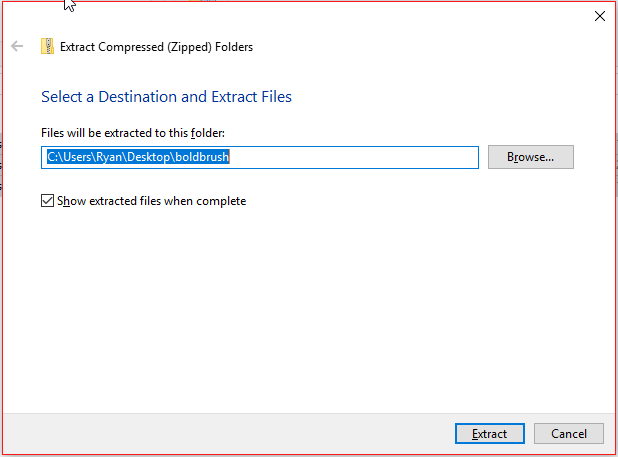
- Then, click on the Extract tab to unzip.
- Further, you must select all the unzipped files and select the install option.
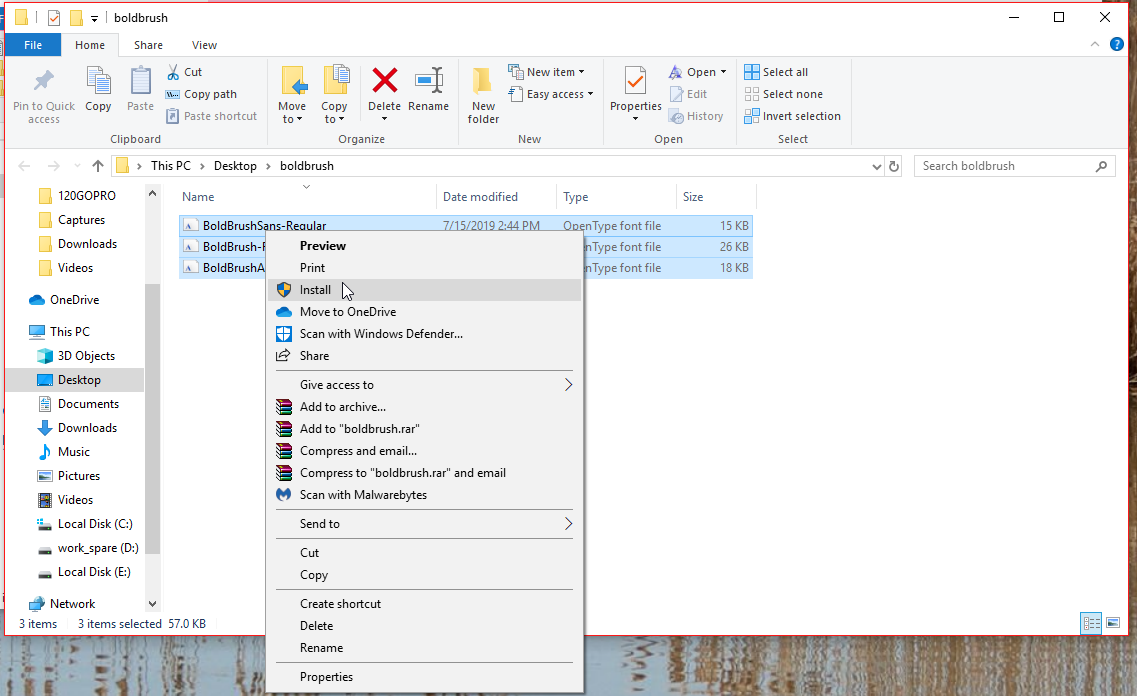
- Finally, the font will be installed on your Windows computer.
How to Download Fonts on Mac Computers?
Mac users can follow the below steps to download and install the font to your Mac. The downloaded files will be in a zip file, so you need to extract them. Let’s have a look at the steps to download:
- Download the font file.
- Then, extract the zipped file by double-clicking on the downloaded file.
- Afterward, double-click the font from the Finder window.
- Next, hit the Install font tab from the font preview window.
- After that, the font will be installed on your computer.
- Finally, it is ready to upload to your Cricut.
Now, you will learn how to upload fonts to Cricut.
How to Upload Font to Cricut Design Space?
Uploading the font to your Cricut is simple. You just need to follow the basic steps to upload fonts. Make sure you have downloaded the Design Space to your system.
Here are the steps to upload the font to Cricut:
- First, download the font.
- Then, unzip the folder since there are two types of font files: .ttf and .otf. We recommend you go with the .otf file.
- After unzipping the file, install the fonts with the given prompts on the screen.
- Once installed, open the Cricut software on your computer.
- Then, head to the Published Centre.
- Next, navigate to the Publication Menu on the right.
- After that, click Visual Styles and Add Font Family (you can find these options under uploaded fonts.)
- Afterward, type the name of the font you want to upload.
- Then, tap on the Add Font tab.
- Finally, you need to choose the font you want to upload to Cricut.
Conclusion
In short, the guide explored how to upload font to Cricut. With this detailed guide, you have to learn where to find the fonts for your Cricut projects. After that, we gave the complete step-by-step instructions for downloading and installing the fonts to your Cricut. Once you install the font to your computer, uploading the font to your Cricut is not very difficult. Moreover, the blog covered the downloading process for both Windows and Mac users.
FAQs
Question 1: How to upload fonts into Cricut Design Space?
Answer: To upload the fonts to your Cricut software, do the following steps:
- Once installed, open the Cricut Design Space software on your computer.
- Then, go to the Text option.
- Afterward, navigate to the Fonts menu and choose All options.
- Further, you have to enter the font name you have installed on your desktop. While entering the name, you will see the list.
- Then, click on Apply to use the font.
Question 2: How do I add fonts to my Android device?
Answer: To add the fonts to your Android device, you have to install the font using a font manager. To download, follow the steps given below:
- Install the iFont, a font manager app from the Google Play Store.
- Then, choose the font you like and download it.
- Afterward, find the downloaded file from your folders.
- If the file is compressed, then unzip it.
- After that, you have to open iFont and move to My>My Font.
- Finally, you have added the fonts to your Android device.
Question 2: What are the best websites to download free fonts?
Answer: Many platforms offer the fonts for free. Below is the name of the website from where you can easily download the fonts without paying a single penny.
- MyFonts
- Creative Market
- Creative Fabrica
- Fontasy
- DaFont
- Google Fonts
- FontSpace
- FontM
- FontStruct
Besides, we recommend you find your font from Creative Market or Creative Fabrica, as they offer eye-catching fonts for Cricut users.